Tutorials - Working with the Story Editor
Story Editor Layout
The Story Editor has 4 panels.
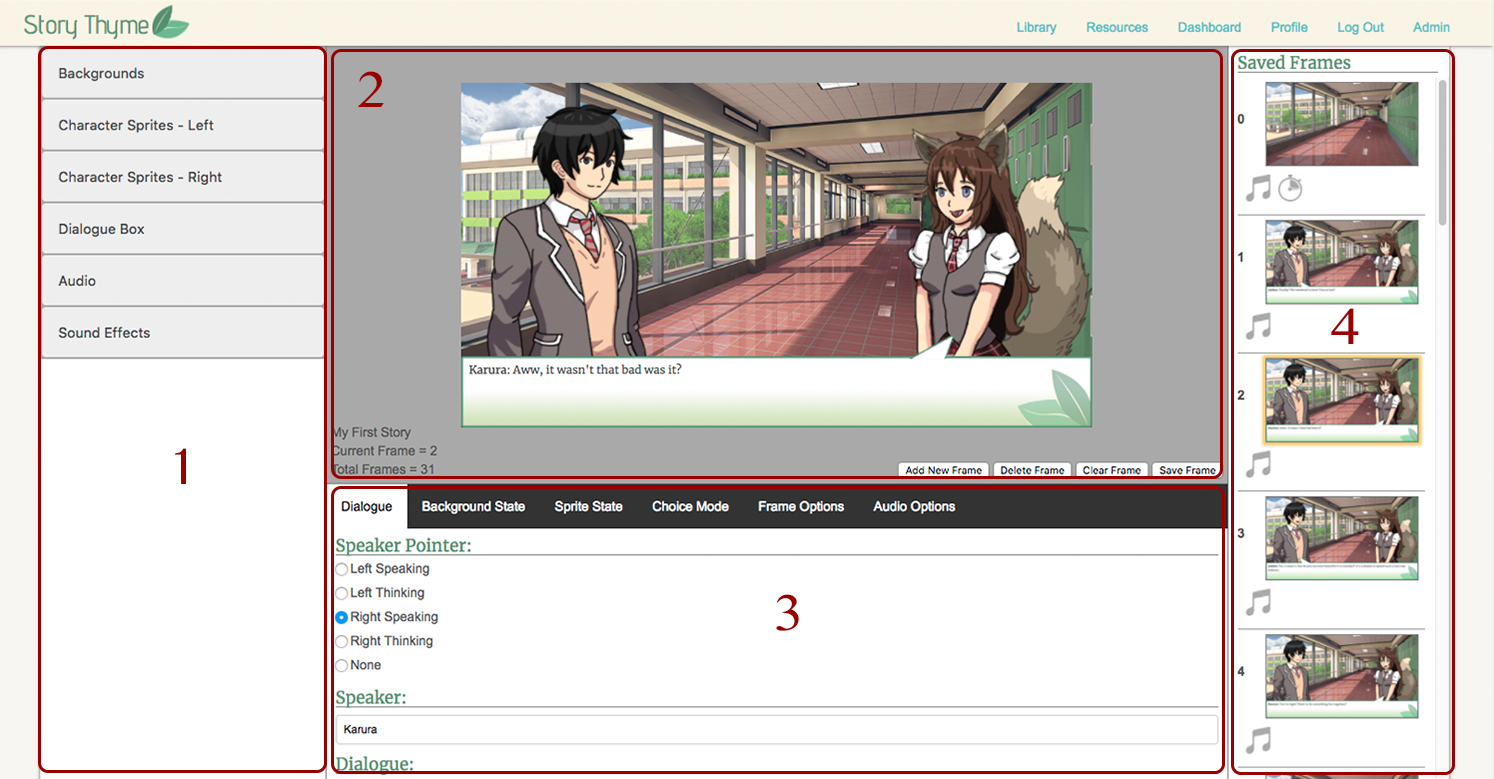
- Resource Panel
- Current Frame Panel
- Frame Settings Panel
- Saved Frames Panel
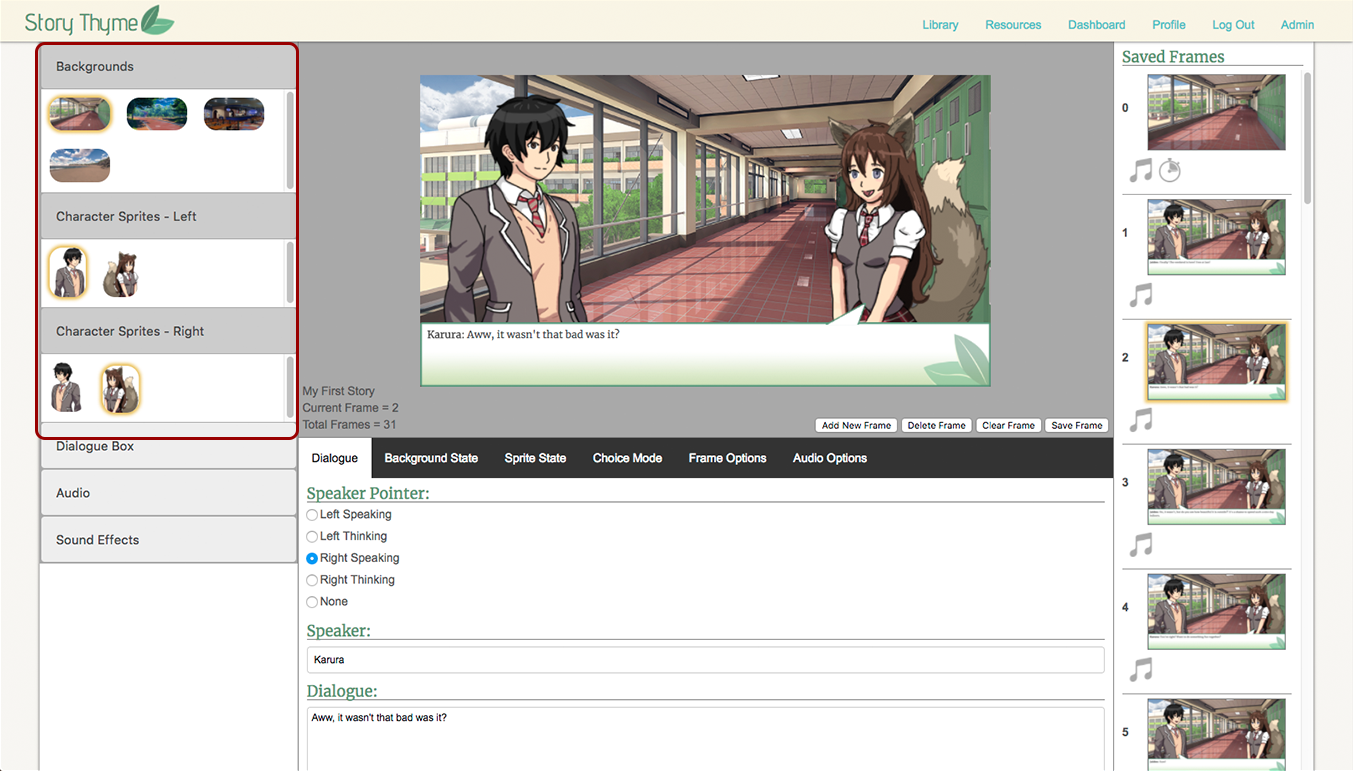
The Resource Panel
The Resource Panel contains all of the resources that the story has access to. You can open and close the boxes to view, select, and deselect resources. Clicking on a resource will activate the resource and place it on the current frame. Active resources will have a golden box around them. Clicking on an active resources will deactivate the resource and remove it from the current frame.
The Current Frame Panel
The Current Frame Panel displays a preview of the frame that is being currently edited.
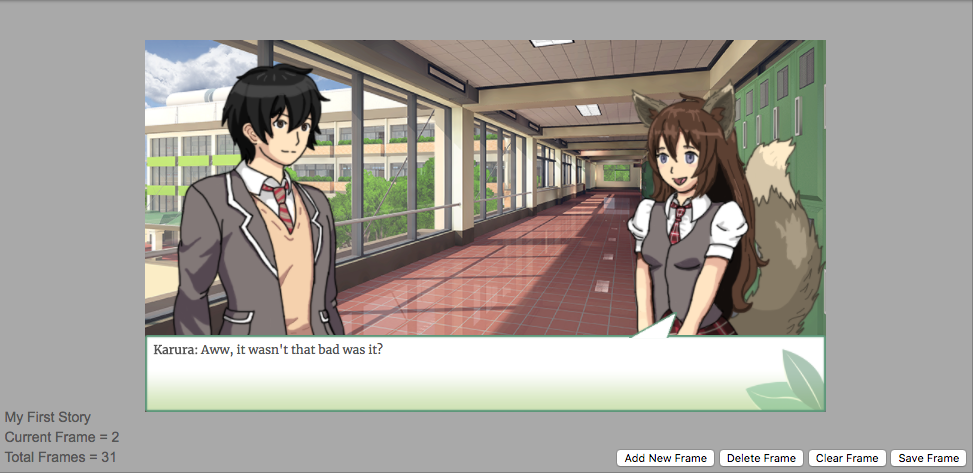
It also displays the story title, the ID of the current frame, and the total number of frames that the story has. From here, you can also add extra frames to the story, delete a frame, clear the contents of the current frame, or save the current frame.
- The "Add new Frame" button will add a new frame after the currently selected frame.
- The "Delete Frame" button will delete the currently selected frame.
- The "Clear Frame" button will remove all resources from the current frame and reset all of the settings to their default options.
- The "Save Frame" button will save the current frame and add it to the Saved Frames list.
Frame Settings Panel
The Frame Settings Panel contains the various settings that can be changed for the current frame.
Dialogue
The Dialogue section is where you can add dialogue to the current frame.
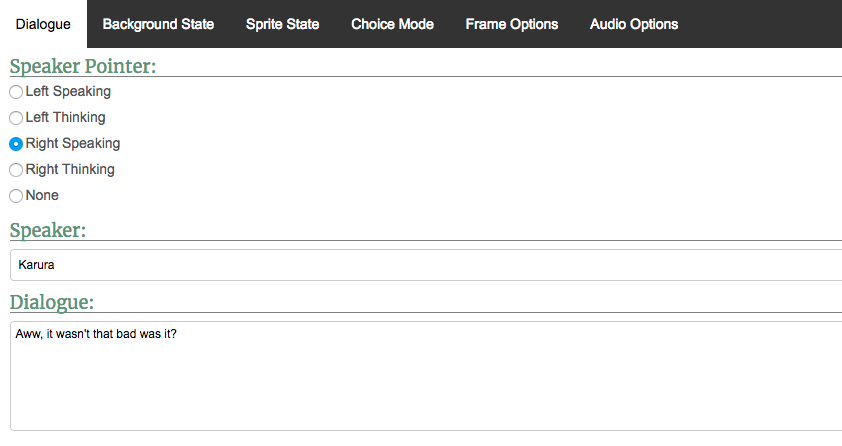
- The Speaker Pointer points at either the left or right sprite. It can be a speaking bubble or a thinking bubble, or none.
- Text placed in the Speaker bar will be displayed in bold.
- Text placed in the Dialogue box will be placed after the Speaker and will be displayed normally.

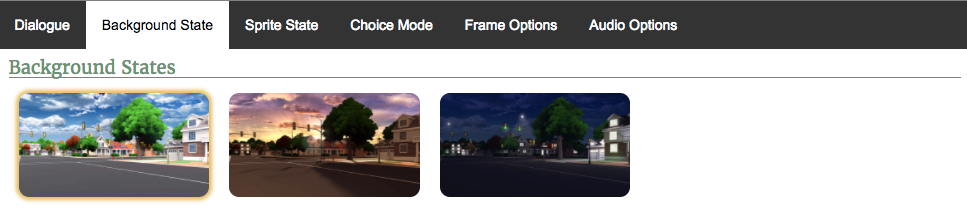
Background State
The Background State section is where you can select a different state for the selected background. If the selected background has different states, they will be displayed here.
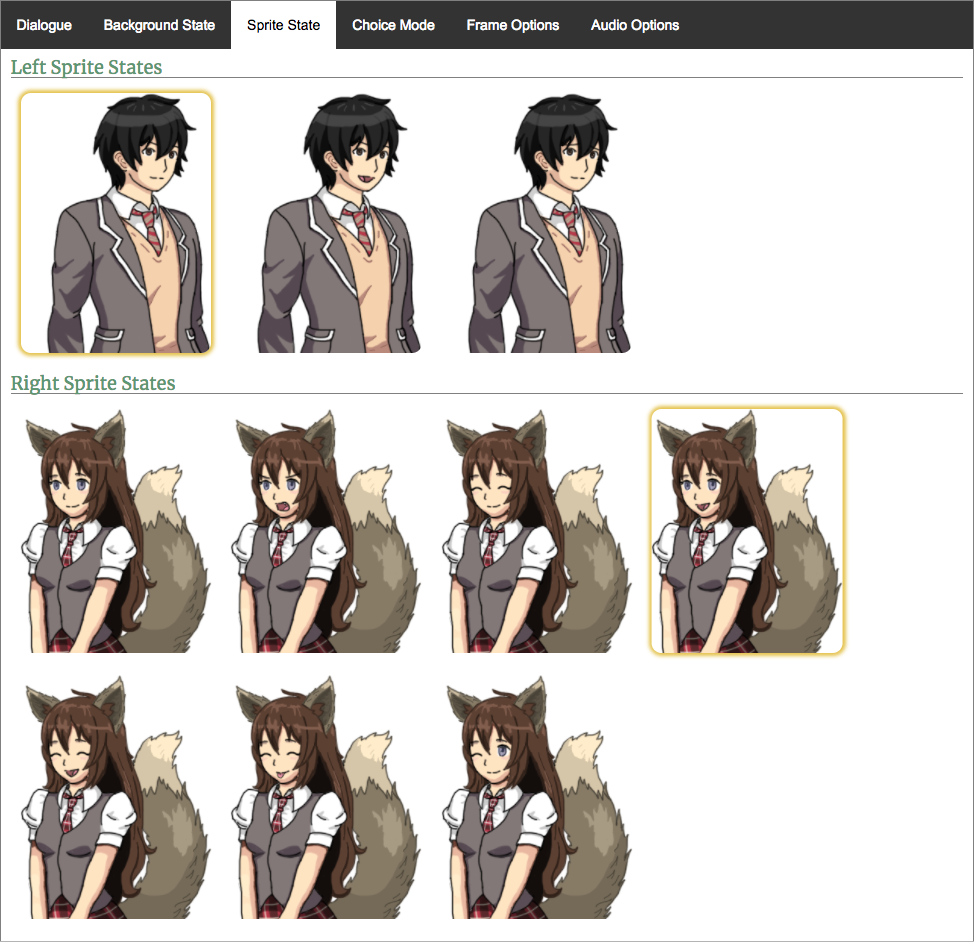
Sprite State
The Sprite State section is where you can select a different state for the selected left and right sprites. If the selected sprites have different states, they will be displayed here.
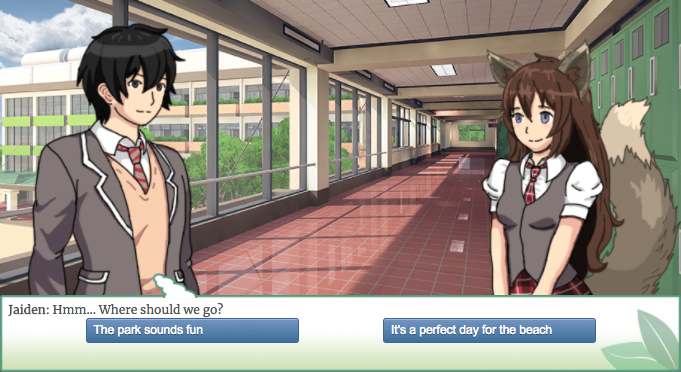
Choice Mode
The Choice Mode section is where you can set wether the current frame offers players a choice.

Setting Choice mode to true will reveal more options. You can set up to 4 choices. The display text is what will show in the frame. You can set which frame the choice will lead to if chosen by the reader. Each frame has an ID, which you can see in the Saved Frames Panel. You can specify which frame each choice will jump to, by selecting the desired frame's ID from the drop down selection. This way, you can create branching stories.
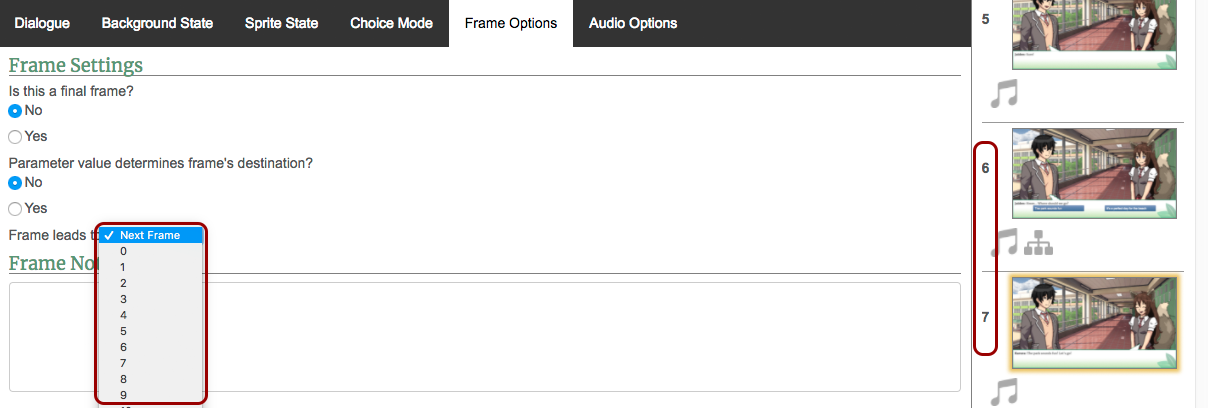
Frame Options
The Frame Options section is where you can edit other options of the current frame.
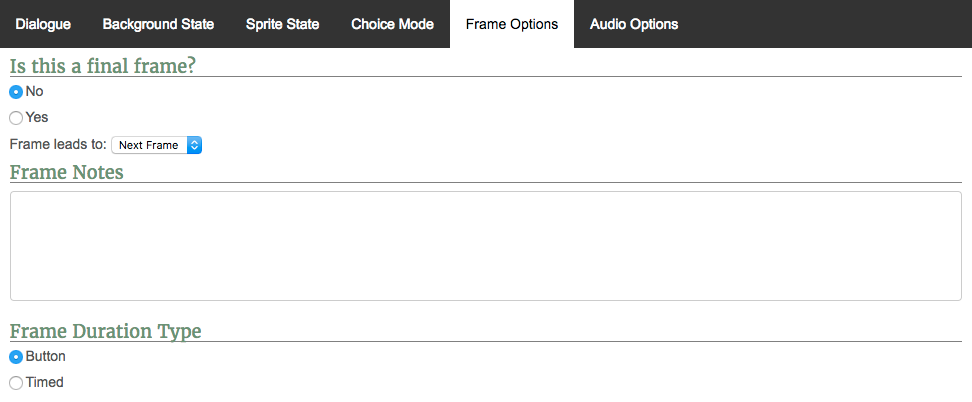
Setting the frame to a final frame will make the story end once the reader reaches that frame.
You can also change which frame the current frame will jump. "Next Frame" means the frame will just move on to the next frame ahead of it. You can also select an number from the drop down menu. This number represents the frame IDs. The current frame will jump to the frame with the ID that is selected. You can see each frame's ID number from the Saved Frames Panel.
The frame notes box is where you can write any notes for the current frames. The notes will not display during story preview and are meant to help with story creation.
The frame duration is how long the current frame displays for. Frame duration cannot be set if Choice Mode is set to true.
Setting it to button will the display a button with the word "Next" or "End" (depending on wether or not the frame is an end frame). Setting it to Timed will reveal more options. A timed frame will display for how ever long the timer is set to. 1000 is the equivalent of 1 second. After the time is up, the frame can either immediately jump to the next frame (or whatever frame it is set to jump to), or fade out.
If Fade Out is set to true, then some additional set of options will be displayed.
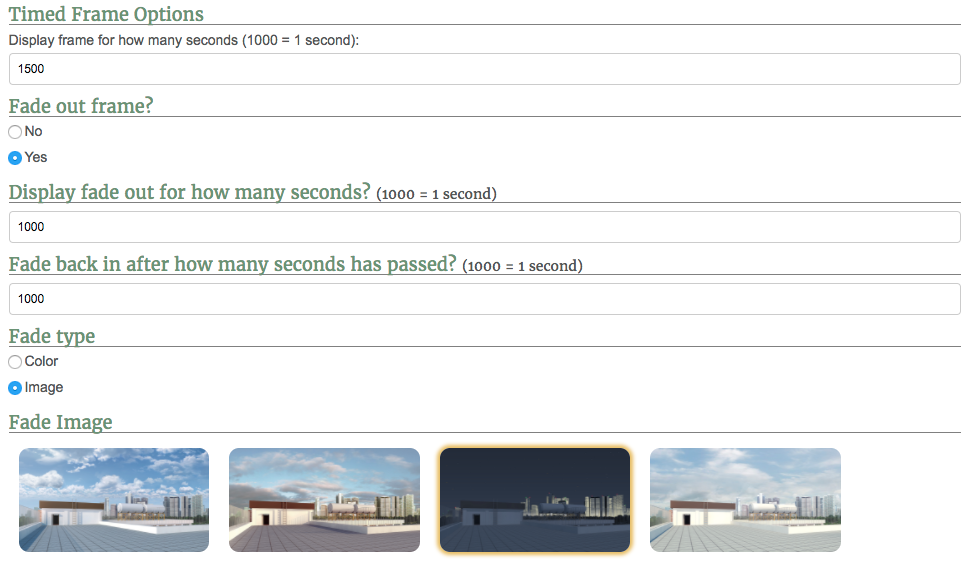
You can set how long the transition lasts for in the "Display fade out for how many seconds?" Input form. Setting it to 1000 means that the frame will take 1000 milliseconds (1 second) to fade out.
You can set how long it takes for the following frame to fade back in, in the "Fade back in after how many seconds has passed?" input form. Setting it to 1000 means that after the frame has fully faded out, it will wait 1000 milliseconds before fading back in.
The type of fade can be set to either a color or an image. If color is selected, the frame will fade into whatever color is selected. If an image is selected, the frame will fade into which ever image is selected. This option can be used to simulate a transition in time. For example, we can start our frame with a city in the daytime. We then set the fade to an image of the same city at night time. When previewed, the city will slowly transition from morning, to night time. You can apply the same idea to create other effects, such as a change in weather.

Audio Options
The Audio Options section is where you set the settings for the currently selected audio. From here, you can play the currently selected audio and specify wether the audio continuously loops.

Saved Frames Panel
The Saved Frames Panel displays all of the frames of the story. Each frame may also display icons depending on their settings.

- Music Icon = This frame contains Audio and or a Sound Effect
- Chart Icon = This frame is set to Choice Mode true
- Arrow Icon = This frame jumps to the frame with an ID of 21
- End Icon = This is an ending frame
- Stopwatch Icon = This is a timed frame
To preview your story click on the "Preview Story" button. This will start the story preview from the currently selected frame.